 63
63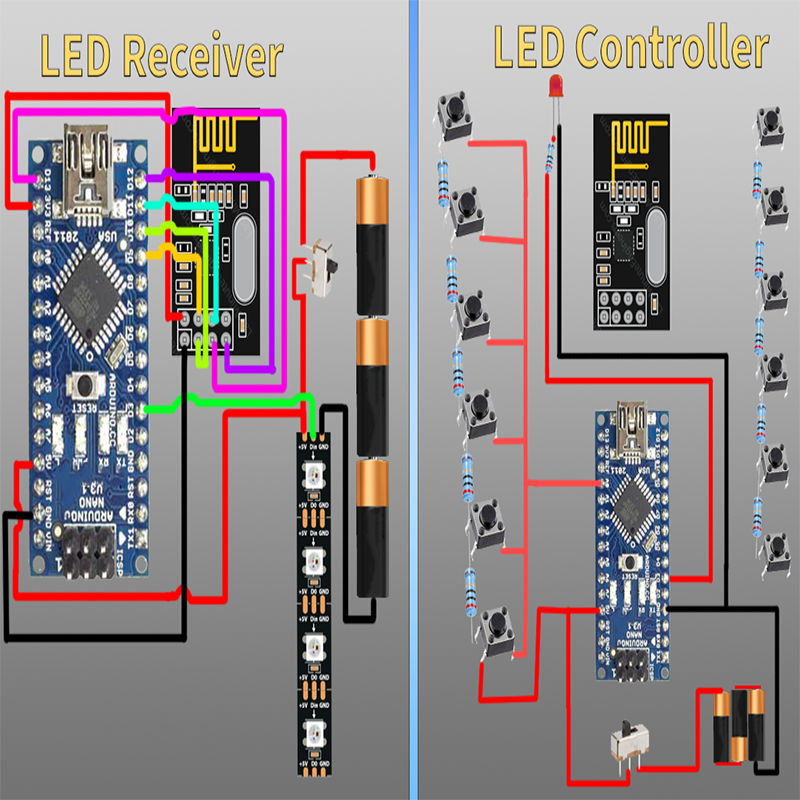
More Projects You May Like
LED Drawing Board
Bring your drawing to life with an LED drawing board. By using bluetooth, draw on your iPhone and watch the image appear instantly.
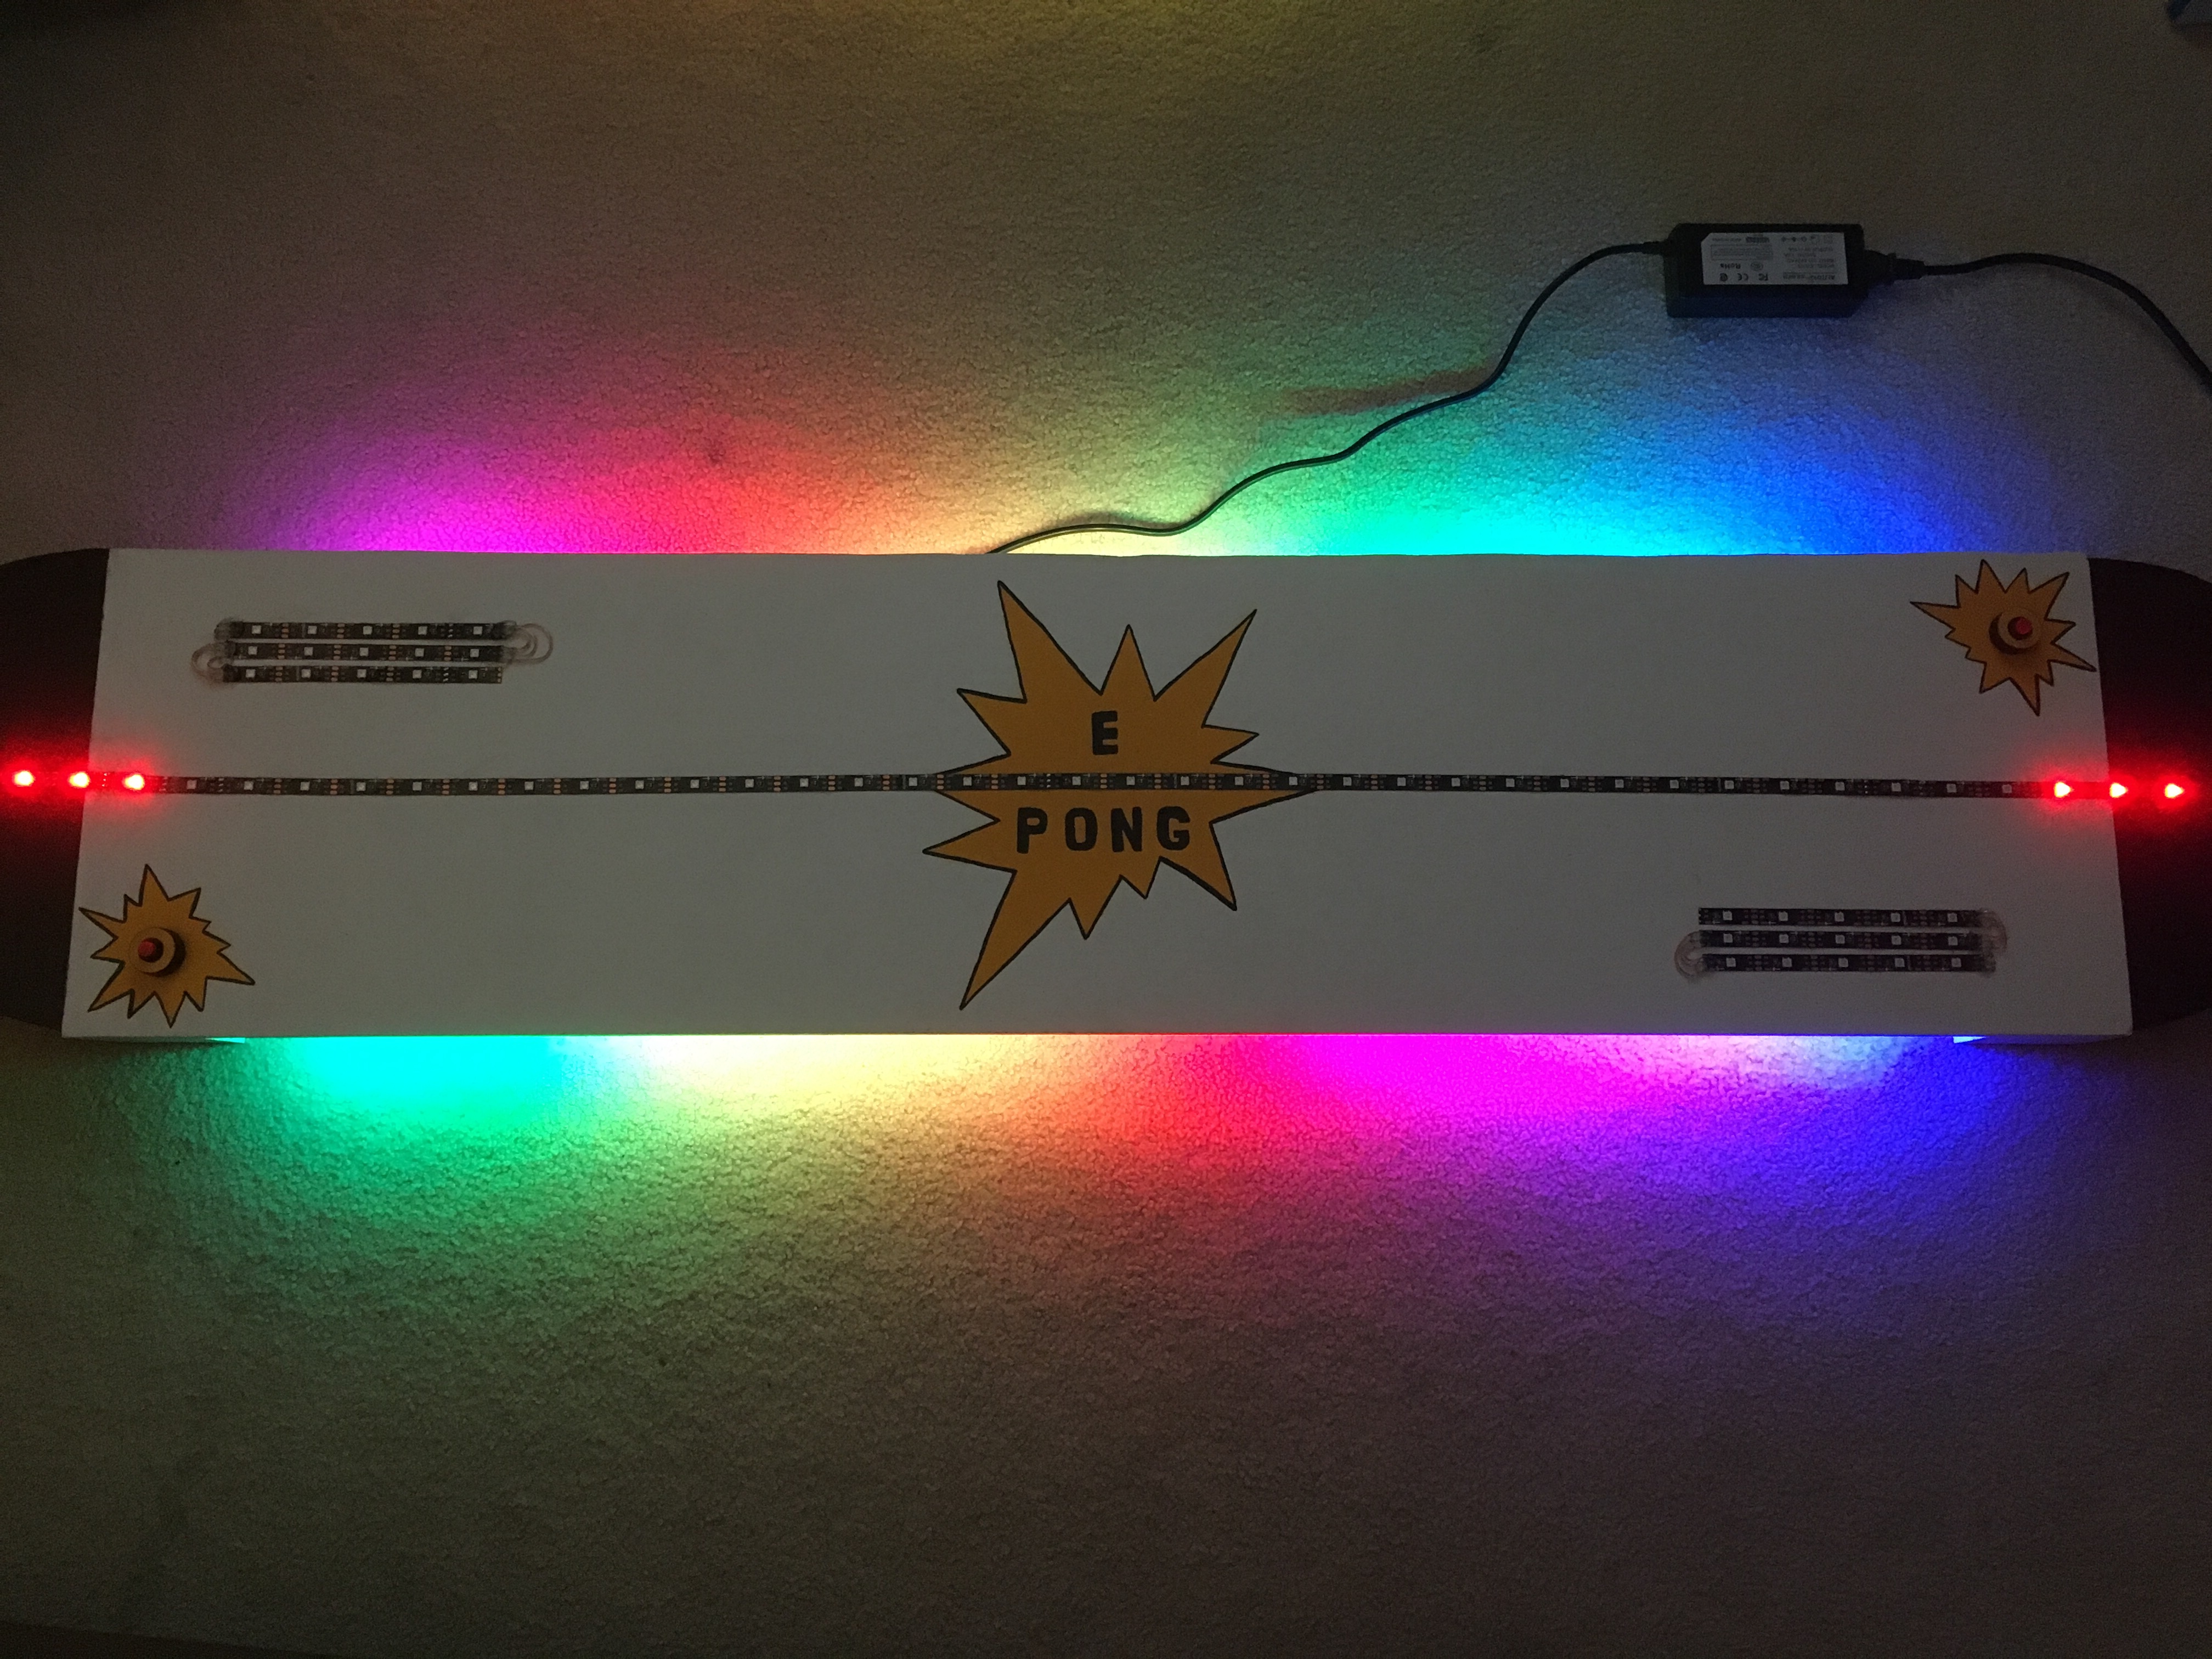
E Pong
Build a fun an interactive drinking game. This is great for parties and a great way to test reflexes.
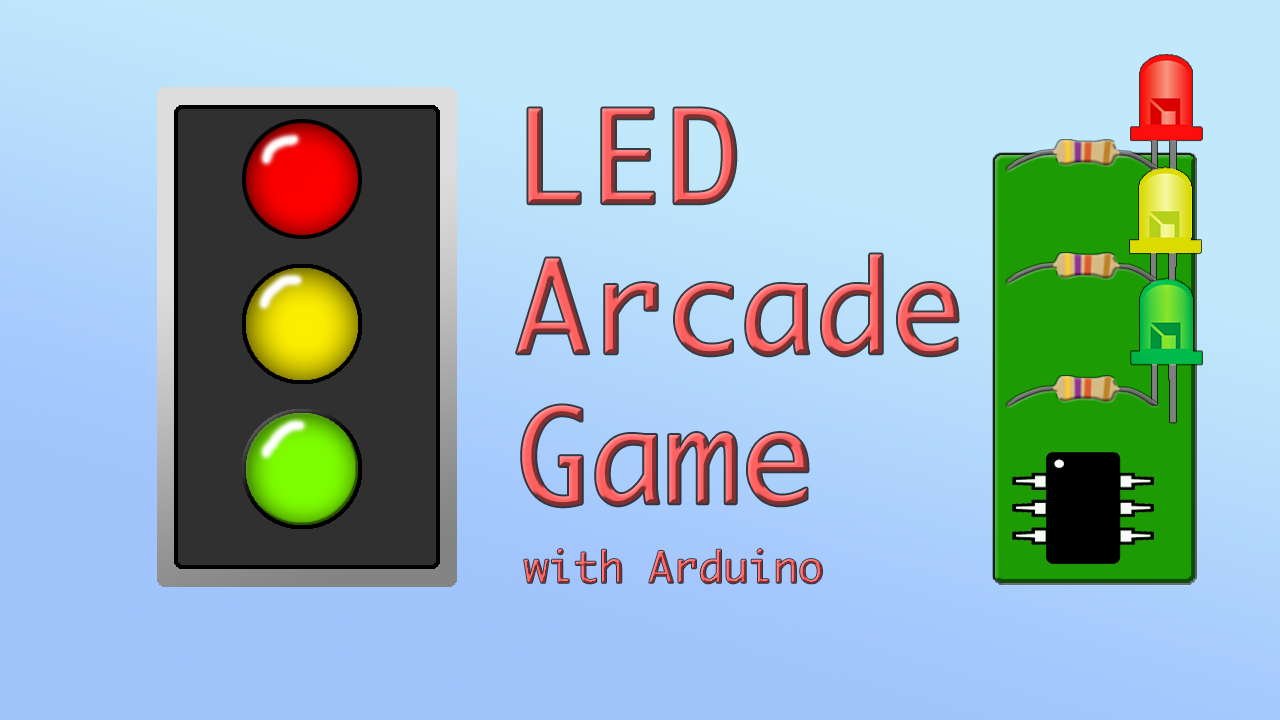
Stoplight Game
Create a fun, mini, hand-held game that is a great learning experience using shift registers and LEDs.
Sentimental Audio Gift
A perfect give to give to your loved ones to remember someone who has passed away.